Pages

Sunday, December 1, 2013

Fixing up the laundry room/pantry

 Somehow, the pantry and laundry area of my house is always the messiest. Imagine that. In line with my goals to get the entire house organized during the year of 2014, I decided to tackle this space. The before pictures are, well, embarrassing. And if I'm being honest, I cleaned up quite a bit before taking these before photos. You normally can't see the floor thanks to all the dirty clothes piled up.


I went through all the food in the pantry and chucked everything that was expired. The worst I found was baking powder that had expired in 2007...that I had just used last weekend. VOMIT. 

I have shelves organized by type of food, and frequency of use. I got rid of small appliances we never use anymore, and organized what we wanted to keep. I think it looks a LOT better. For me, it's easier to be motivated to plan our meals when I know what foods we have on hand.


We even created a shelf especially for Nolan. All of his foods and snacks are located on the bottom shelf so he is able to pick what he'd like to have.


And this part just makes me happy. I found this sign at the beach and knew I just had to have it.


One part of the pantry/laundry area I knew I could spruce up a bit was the laundry sink. It was really nothing special to look at, and I had an idea for something that would be a relatively quick fix.


I decided to make a skirt for the sink! I went to Jo-ann Fabrics and got 1.5 yards of fabric with a fun print and 1.5 yards of liner fabric. I sewed the two together right side in and was sure to leave a little part open so I could flip it right side out. (Shown in picture 3 below.) After I finished flipping it right side out, I sewed the little hole shut and ironed on some velcro. Ironing on the velcro worked for the fabric, but I realized I couldn't exactly iron it to the sink. So I decided to try heating the glue up with my hair dryer. Fail. It just didn't stick. So I went to the grocery store and bought some velcro specifically for home applications, and swapped out that one side.


And oh was it worth it! Now, not only does it look less like crap, but we can actually store stuff under the sheet and not have it look so messy!


There are still a few things I'd like to do to this room. Painting, nicer shelving, and replacing/removing the cabinets are just a few of the things on my list. But little by little we'll get there.

Tuesday, November 26, 2013

Peppermint Bark Shake

Today, a friend mentioned the Chickfila peppermint milkshake in a Facebook status and I instantly started craving one. We didn't want to go out for dinner tonight, so I decided to try to make my own version. Peppermint shakes are delicious, so Peppermint bark milkshakes have to be eleventybillion times better. Right?

RIGHT.

Here's how I made it:

Take 12 Ghiradelli Peppermint bark squares and crush them up a bit.


I crushed them in a plastic bag using a rolling pin.


Add 2 cups of vanilla ice cream to a blender...


 And one cup of milk, and throw in most of the peppermint bark. Reserve a little for garnishing on top.


Once it's all smooth, you're good to go! I put some of the crushed peppermint bark on top of Shon's shake for garnishing.


And even the little one got a shake as well! (No crushed peppermint bark, because I'm a freak about choking...even still.)


The peppermint bark shake is toddler approved!


Saturday, November 23, 2013

Old Teacher's Desk Refurbished


I had been wanting a desk for my computer for a pretty long time. I knew I didn't want to spend a ton of money, so I started my search at IKEA. I never really found anything that I loved, so I continued my search on craigslist. I have refurbished pieces of furniture in the past, so selecting something that was old and dingy was not out of the question. In fact, I kind of viewed it as a challenge. A few months ago, I found this old teacher's desk on craigslist listed for just $30! I scooped it up quickly and brought it home. 

The previous owner said it was built in the 40's, and it was hardwood, so it was ideal for refurbishing. I knew exactly what I wanted to do to it when I saw it. I'm not a fan of the honey colored wood, so I knew I wanted to stain the top a dark espresso brown. I decided to pair that with a bottom that was painted white, and to finish it off, I'd replace the drawer pulls. I wasn't a fan of the plain wood drawer pulls, so I chose a brushed nickel cup pull. 

I love the way it turned out, but it was certainly not the easiest process ever.

 
My first step was to refinish the desk top. I began by sanding off the old finish, and making sure it was nice and smooth. (And yes, I used that rinky-dink hand sander for the whole project.) After all of the old finish was gone, I took a tack cloth to it to ensure all of the dust was gone.

  
The stain I chose was a Minwax Polyshades Dark Espresso Satin finish. It is a combo product that has both wood stain and poly in it, and one less step is always good! Here you can see what it looks like after 1 coat of the stain. The instructions on the can say to put on 2 coats to ensure best results.


And here you have it after the second coat. It's still wet, so it looks pretty glossy, but it dried to a satin finish. I am really pleased with how it turned out.


The next step was to prep and paint the rest of the desk. I tried everything to get the stinking drawer pulls off and absolutely nothing was working. I asked my dad for advice, and he said it was probably put on with a combination of nails and glue, so it'd be pretty hard to get them off. He said if there was some way to heat up the glue to loosen it, that'd probably be my best bet. I thought for a bit, and decided to try heating up the glue with my hair dryer. And doggone if those things didn't come right off after I heated them up for a few seconds.


Then I painted the rest of the desk white. I painted two coats, and quickly realized something was not quite right. The icky old brown stain kept showing through the paint. I googled to see if I could find some other product that might help, and I came up with Zinsser Shellac. I have to say, for the most part, it worked pretty well. I put 2 coats on (with plenty of drying time between coats) and then painted yet another coat of white paint on top. 99% of the desk looks awesome, but I must've been a little lazy with the shellac in a few parts, because I can still see a bit of the brown stain. You have to be up pretty close to notice it, but it still bothers me.


And now for the great reveal! I am really happy with the final product. It's such a huge desk, so I've got plenty of space for my computer, an extra screen, a printer, and all my photography equipment. Will I refurbish furniture again? Heck yes. Taking something from ugly and old to nearly new is incredibly rewarding.

Friday, November 22, 2013

Unexpected Garage Door Makeover

On our house to-do list, we had planned, eventually, to replace the garage door. It was old, creaky, the color was all wrong, and it was just generally ugly. Well, though it was on our list to replace, we hadn't planned to do it as quickly as we had it done.


Back in October of last year, Shon and I were sitting in our family room (which is right next to the garage) watching tv, and all of a sudden we heard an EXTREMELY loud noise. We ran to the door to the garage to see what was going on only to find the  mounting hardware ripped completely out of the ceiling and dangling barely above Shon's Honda Accord. Upon closer inspection, we discovered that one of the previous owners of our house had the mounting hardware pop out of the ceiling as well and simply did a poor patching job. Hence, our super fun discovery.

(Drawing courtesy of: http://www.popularmechanics.com/home/improvement/outdoor-projects/garage-door-opener-how-it-works)

We bought a garage door from Home Depot, and had it installed by their installers as well. The quality of the door is perfectly fine, but I can honestly say I do not recommend using their installing service. It took them about 2 months longer to get the job done than they told us they'd come out and they left the job site dirty and with screws all over the ground. Thank goodness I found them so we didn't puncture any of our tires when we were finally able to use our garage again.

Despite the poor installation service, we are very happy with the way it turned out. It's got a bit of the craftsman style we like, and it doesn't creak like the old one!


Wednesday, November 20, 2013

Half bath renovation

One of the first projects we completed in this house was to renovate the half bathroom. The bathroom is very small, but we did what we could to spice it up a bit.

Before we got our hands on the bathroom, it was pretty bland. White toilet, white sink, white walls, white floor. And the worst? CHROME FIXTURES EVERYWHERE! That's probably my biggest pet peeve.


The first step was to put a skim coat on the walls and ceiling. It had some sort of weird texture...maybe a previous owner's attempt at venetian plaster. Fail. It took a good long while, a lot of patience, and a LOT of sanding. However, we ended up with a very smooth surface, ready to paint.


Shon and I love the look of oil-rubbed bronze, so this faucet was exactly what the doctor ordered.


I was really excited to get started with painting, because I knew I wanted to try something a little more than just a single color on the walls. We chose to do one accent wall with stripes. The colors we selected were Behr Sea Salt and Behr Ocean Pearl. I am so happy with the way it turned out!


We bought a new mirror, a new light fixture, a new hand towel, and a new faucet. AND, I even replaced the faucet on my own! Good gravy was it challenging for never having done it before. It only took 5 attempts before the faucet and drain assembly were leak-free! :-P This is now probably one of my favorite rooms in the house. Hooray for hard work and a little creativity!

Tuesday, November 19, 2013

Guest bathroom vanity organization

Tonight, I decided to do a quick and easy project so I could have a bit of time to relax do other, more pressing chores. At one point, this vanity didn't look too terrible. We had things somewhat organized, but then, life kinda just got in the way, and we started chucking things underneath without a second glance as to where they landed.

Mid-project, after I'd already pulled everything out from underneath the vanity, I realized how dumb this was to start this project in the bathroom attached to Nolan's room...while he slept. Dumb. Let me reiterate, DUMB. He started stirring and making noises, so I sat there for a bit staring at the mess I'd made, wondering if I should continue on. I ultimately decided that, since he needed to use the bathroom in the morning when he woke up, I should just quietly and carefully finish the project. 

Before: Oh the clutter.


And after! I have things organized by the family member that uses the items. From left to right, we have: Tater's things, My things, Nolan's things, community things, Shon's things, and surplus items that we all use. All this organization is really starting to feel good, and somewhat normal. Such an odd feeling since I've been kind of a hot mess my whole life.
 

Sunday, November 17, 2013

Organizing the Hall Closet

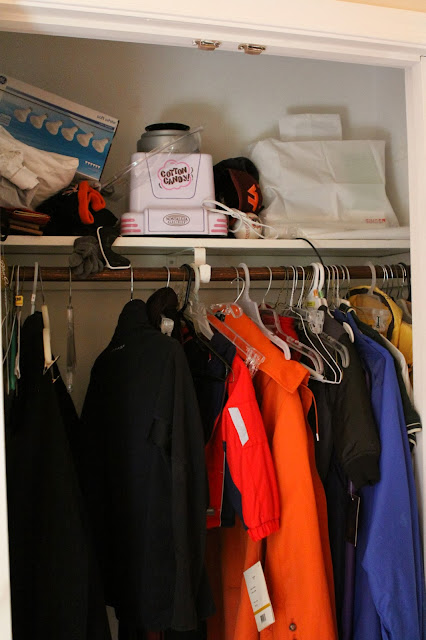
Today's nap-time project (I have a 2 year old, since I haven't mentioned that yet on this blog) was to organize the front hall closet. It had gotten so out of control that we didn't even put the jackets we wore regularly in it; we just hung them on the back of our kitchen chairs. Sound familiar to anyone? As our son, Nolan, says, "I MAKED A MESS!" 

In the closet, we had a box we had yet to unpack from moving to this house (almost a year and a half ago now), jackets that no longer fit any of us, a bunch of old clothes to donate, and approximately 50eleventythousand hangers not being used. Here's what it looked like before:


disorganized closet 1

disorganized closet 2

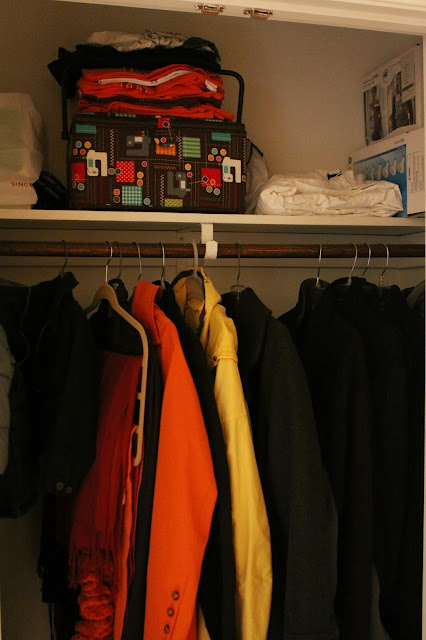
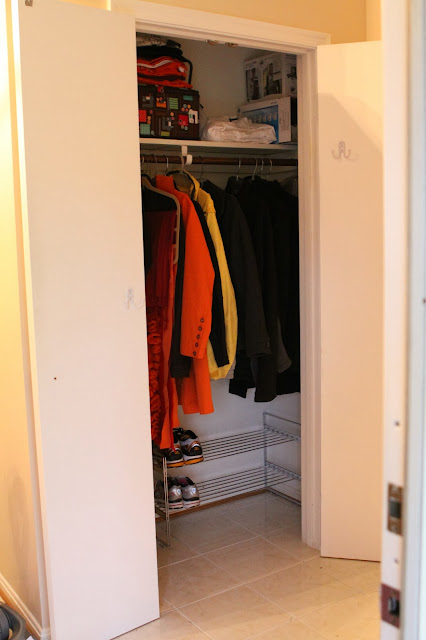
And here's the after! We now have a place to put our shoes when we come in the house, quite a few less jackets, and even an organizational container for our winter items and for Tater's things.

hall closet organization

hall closet organization

hall closet organization

Now we've just got to make the effort to hang our jackets back up when we come inside.